Adding Bra Strap Carriers to your dresses and tops
This is my new favorite method to making bra strap carriers. I’ve heard these called many things – carriers, holders, lingerie strap-straps, whatever. Basically they’re belt loops for your bra straps.
Do you have shirts that constantly slip off your shoulders when you wear them? Or the other way around – do your bra straps refuse to stay in place? These nifty things help with both those problems. I’ve added them to clothes like the ones above that have wide or deep necklines. Attaching your shirt to your bra straps really helps and you can add these to clothes even after you’ve made them.
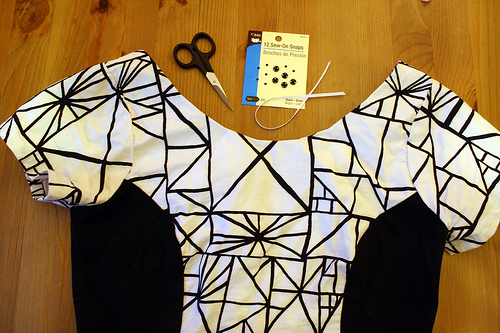
You’ll need two sets of sew on snaps, thread, scissors, very narrow ribbon (I’m using 1/8″), and your sewing machine.
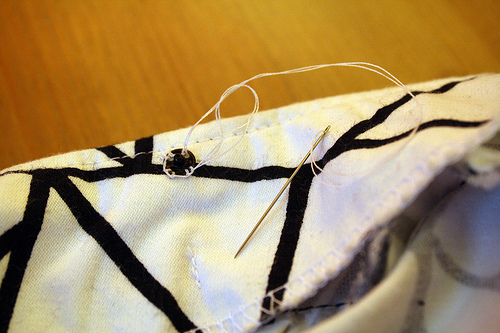
First, stitch the bottom part of the snap to your shirt/dress on the inside of the shoulder seam. I’m sewing it on to a facing but you can also sew to the lining or the seam allowances, just don’t stitch through to the outside.
Start with your knot underneath the facing/seam allowance if you can, you want to reduce bulk around the snap so the snaps can hold together well. I made a basic blanket stitch around my snap and tied my knot under the facing when I finished.
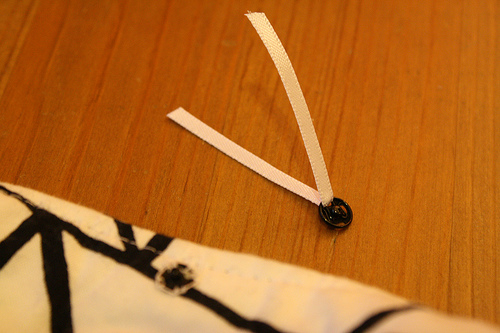
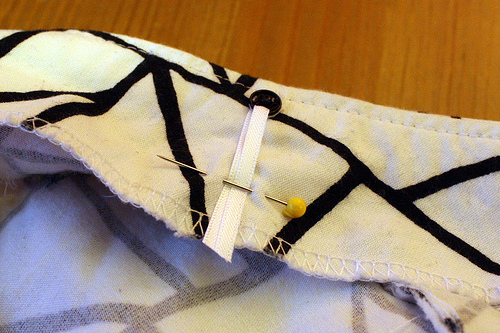
Next cut a 2.5″ length of ribbon (more if you’ve got really wide bra straps, less if you’re working on a tank top or something with narrow shoulder straps) and thread it through the upper snap and match up the edges of the ribbon.
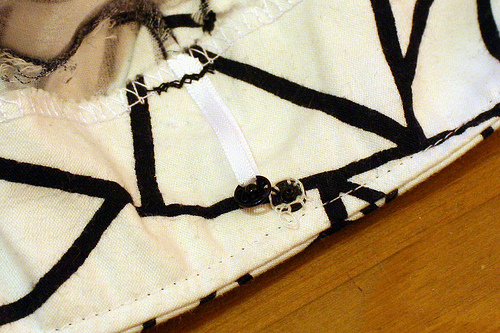
Attach the upper snap to the bottom snap and pin the ribbon flat along the shoulder seam.
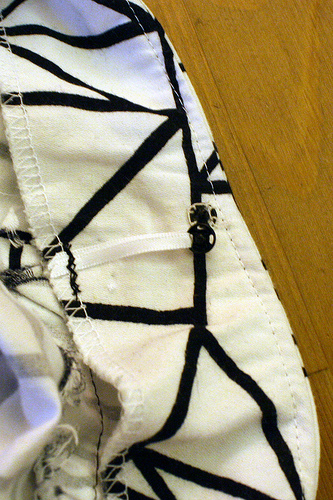
Using a short, narrow zig zag stitch, sew over the ribbon close to the edges. Don’t stitch across more than two or three times or else you risk putting too many holes in the ribbon. Trim your ribbon ends if needed.
Repeat for the other shoulder.
Now when you wear your dress/top you can unsnap your carrier, tuck your bra strap under and snap it all back in place.
The reason I like this ribbon method is because I used to use a length of serger chain but sometimes the threads would break or come untied from snap. Threading the ribbon through the snap helps reduce bulk compared to tying a knot at the snap.



I have done this before but this is the BEST method yet! Thank YOU!
Thanks Dixie, a lovely tutorial & hints, and Very timely 😉
Nifty!
Awesome idea!
I’m definitely going to put some on my Rachel Comey top and I think the boat neckline on my Peony dress could do with some too. Thanks for the tutorial.
This is such a good idea, I need to do this on the dress I’m currently working on – otherwise I was thinking I’d have to wear a strapless bra. Perfect!
So funny. I had just made myself a note this a.m. to do this to one of my shirts. Was not quite sure how to do it and thanks to you, now I know.
Nicely done – I’m pinning this to share with my followers.
Thanks for sharing 🙂
Clever! Thanks for the cool tip
What a great idea! I don’t like having my bra straps show so this will be something I’ll definitely be doing. 🙂
Definitely stowing this away for later, great idea!!
Thanks for this post. I need to put these in a few shirts….And I love the dress – did you make that too?
yep, it’s my elisalex dress from by hand london. 🙂
You’re right – this comes in so handy with clothing that won’t cooperate. Thanks for the tut!
i just found your blog, and aside from the great tutorials projects and patterns, you’re from austin! instant crush.
that’s funny, my friend just told me about your cool blog the other day. i really like reading about how you adapted your sewing to life in africa. 🙂
I love your dress you look adorable, I wish I had the same 🙂 Greeting from Carter-Dal
Thanks so much for this great tutorial!