Grainline Archer #3 – Popover Edition!
Susan was nice enough to take pictures of this shirt yesterday on a little blogger meet-up/shopping trip. It was great to meet Jenny of Cashmerette and the lovely Mary of Idle Fancy along with getting to spend time with several of my Austin friends!
By the end of the day I’d eaten a yummy tacos (and Jenny had her first bite of queso), bought several yards of delicious fabric, took a bunch of selfies, ate some cheesecake and generally had a great time all around. And seriously, you guys have to see Nicole’s Cambie of Amazeovaries.
But, onward to the Archer!
The Goal: This being my third Archer shirt (#1, #2) I wanted to do something a little different.
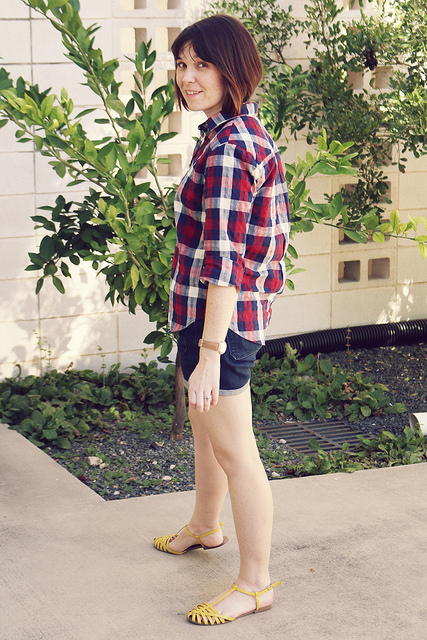
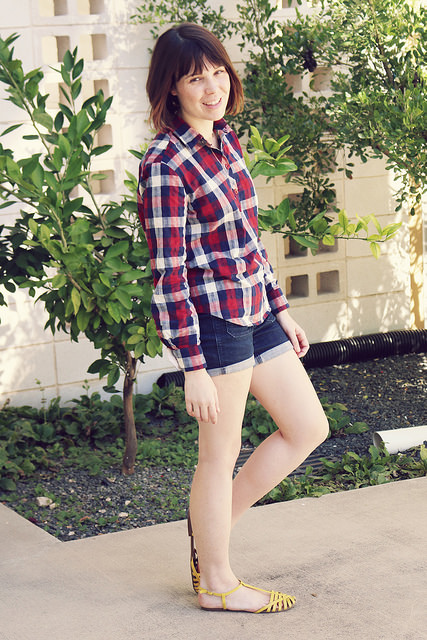
The Pattern: You’ve seen it before, you’ll see it again and you’ll love it every time – the Grainline Archer button down shirt. This time with a twist!
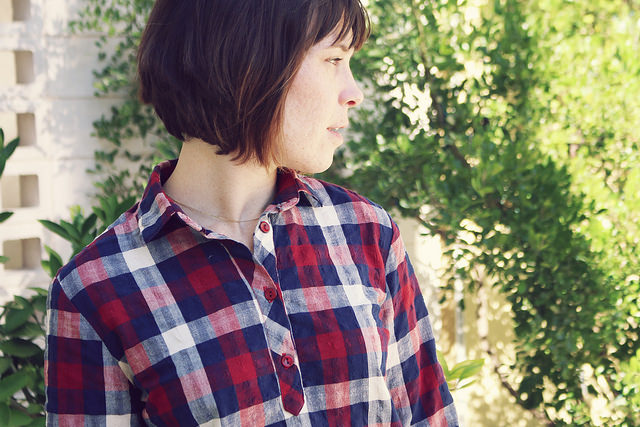
The Fabric: This neat red/white/blue plaid shirting from Form and Fabric (ugh, that place is getting all my money!). This fabric is surprisingly great – lightweight but not transparent, yarn dyed so you don’t have to worry about right and wrong sides. It’s kind of lumberjack-like. Even Justin wanted a shirt made out of this stuff.
Trouble was I didn’t have enough of it for the full shirt. Naturally when I bought the fabric I had a basic idea of what I wanted to make but underestimated my fabric needs (a common problem I have).
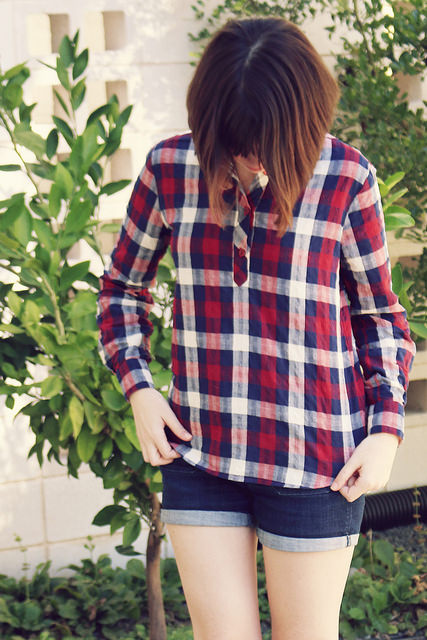
I managed to squeeze out enough (no fabric left for pockets) except for the inside of the cuffs which are just a plain off white cotton. But since I usually will wear this with sleeves rolled up you’ll never see it.
The little red translucent buttons came from my stash.
The Changes: Popover!
I found this Melly Sews tutorial on making a placket, and a second tutorial via Meg’s sweet chambray popover post.
I liked that tutorial because it used only one strip of fabric and you end up with that nice little point on the end. It won’t work well with bulky fabric, however. Too thick to make a clean point.
For the placket piece I just turned the original front button thing pattern piece on the bias which makes the placket extend about halfway down the shirt. I used 3/8″ seams on the placket, to give you an idea of size.
Only other change: I made a second pleat about waist level in the center back, the same size as the pleat attached to the yoke, to cinch in the back fabric just a little bit. I just stitched it down horizontally.
Also, I might have again messed up the cuffs – I think I switched the button and buttonhole placements. Oops. I need to pay better attention.
The Results: Love it, but of course I would. It’s an Archer, duh. This will be great for fall and so far I’ve worn it twice this week. If you wear a garment multiple times immediately after making then you know it’s a keeper.



I love it!! Great fabric and great shirt!
1. This shirt is even awesomer in person!
2. Was great to meet you!
3. Queso. Mmmmmmmmmmmmmm.
this is the perfect fabric for an archer!! heh heh… i say that a lot though… since i’m up to 7 archers i think. love the popover style!
Dixie, this is awesome and my favourite archer so far! I love the pleat at the back to help cinch the wait in a little 😀
Also, that looks like the most fun blogger meet up- look at all those awesome peeps!
Awesome. ‘Nuf said.
You did a fabulous job with this! You’re the easiest person to take great pics of ever, MWAH!
I didn’t realize this was an Archer variation! That’s extra neat. It was so great seeing you yesterday!
I really enjoy hearing about all your solutions, hacks, and workarounds when you sew. I guess it’s time to dust off my sewing blog, maybe?
Omg stop, you are too cute. I LOVE this. Want to steal all that fabric and it’s babies.
THAT WAS YOUR FIRST QUESO EXPERIENCE!?!?!? We should have thrown you a queso “coming out” party or something. Glad I could be present for such a momentous occasion!
Oh my gosh, I didn’t realize that was Jenny’s first queso experience! My brain just exploded. And “Cambie of Amazeovaries”, ha! Might have to steal that one for my blog post. Boobs on boobs, yeah!
Ever since Saturday, I keep thinking about going back to Form & Fabric to snag some of this fabric (and some of that Liberty wool). I’m not sure what to do with it, but it just looks so good on you that I want it! I’m kind of scared of Archer (complicated pattern, plus “will it even look good on me?”), but this is just begging to be a top of some kind.
Oh you guys are too cute! (And queso is so dangerous.) This is a great take on the Archer.
Thanks lady! It was great to meet YOU! So glad we could get so many of us together to welcome you and Mary.
And I’m glad you liked the queso. 😉
Thanks!! It’s my fave Archer, too, at least of the ones I’ve made for myself, lol.
Yes! It was lots of fun. I didn’t realize you had to leave after Co-op or else I would have said bye. Let’s get together again soon.
Hahaha, it helps when you have an experienced blogger to take pics 😉 thanks!
If queso is dangerous I don’t want to be safe. Thanks lady. 😉
Wait – there was liberty WOOL??? what is this madness?! Also, it’s a button down shirt, of course it’ll look good. You might have to an FBA but even though it doesn’t have darts you can still do it. And Grainline has a great sew-along. You just did a Cambie, you can do an Archer!
Thank you!
Haha, thanks Lauren!!
Yes, it is absolutely time for you to do that. 😉 Thanks Roseana
Thanks! ‘Nuf said. 😉
Haha, yes, you are the queen of Archers! And thanks 😉
Thank you Heather!!
The Liberty wool was that crazy $50 flower print I kept hovering over! http://www.formandfabric.com/liberty-wool-flower-inside-flowers-blue/
Oh thay was wool? No wonder it was so expensive.
Yes, please!
Oh, cuuuute! I love this Archer variation- less button placket to iron! The placement on the back yoke is really good, and the inside of the cuffs look like a planned design detail! If you roll the sleeves up j.crew-style they will peek out and look adorable! 🙂
Nice!! Great fabric, so perfect for fall. Thanks for the tute link.
What a cute Archer! The fabric looks perfect and I love your placket variation!
SOooo love this top! Thanks for linking the tutorials, too! I totally want to try that one day.
Really really love this. Your plaid is so great! I’ve been meaning to make more archers!
I love this style, yours looks great! I’m scouring the internet and can’t find how much I should remove from the front pattern piece when cutting on the fold! I’m nervous about accidentally making the neckline too short and not being able to attach the collar! Can you let me know how much you took out when cutting on the fold?
There should be a line on the pattern piece either labeled center front or button markers usually mark the center front so if you connect the buttons placement points from top to bottom that will make a CF line and use that to cut on the fold. If you think about it when you wear a button up shirt the buttons run down the middle of the shirt. Hope that helps!