Lace Top T-Shirt Tutorial

I thought about making a pattern for my Lace Top T-shirt but then I figured it is so easy to make that a tutorial might be better. Basically you are chopping off the upper portion of a shirt and replacing it with a lace piece.
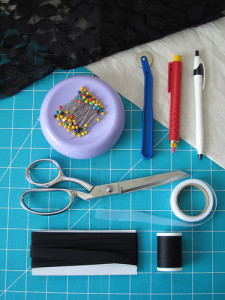
You will need –
- A t-shirt
- Tailor’s chalk or sewing marker
- About 1/3 yd of lace (make sure it isn’t flimsy or rips easily, it has to hold up the rest of the fabric)
- Stay tape for shoulders
- One package bias binding tape for arm and neck openings
- Matching thread
- Paper to trace your pattern on and cutting mat
- Tracing wheel
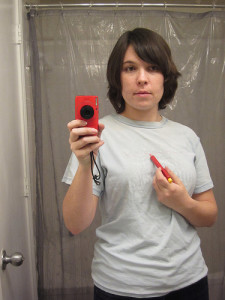
Note: I made my original black and gray shirt from scratch but this tutorial shows you how to make one from an existing t-shirt. The blue shirt you see me using in the pics below is an old shirt that I didn’t mind cutting up to show as an example.
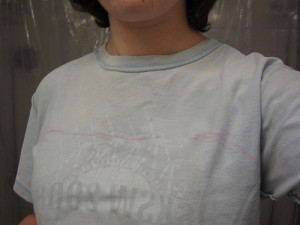
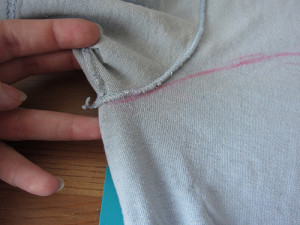
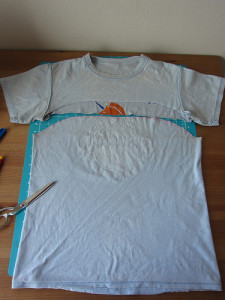
First put on your shirt and stand in front of a mirror. Using your tailors chalk mark your seam line where you will later attach the t-shirt to the lace.
Go from the point where the side seam of the sleeve meets the bodice across to the other side over the top of your bust. Maybe even try a sweet heart design.
It is important to do this while wearing the shirt because you can tell where you’re bra sits and if you just draw a straight line from sleeve seam point to the other sleeve seam point you’ll end up drawing directly on top of your ta-tas and that’s no good! You need to fully cover your girls and your bra with t-shirt rather than transparent lace.
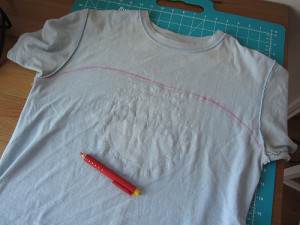
If the line you drew is sloppy you can take off the shirt and clean it up while flat.
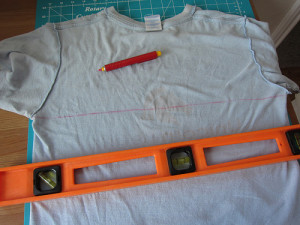
On the back side of the shirt draw a straight line across from each sleeve seam line.
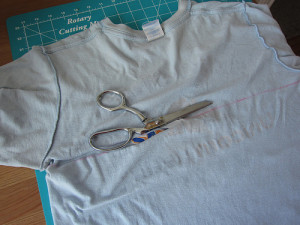
Now cut along the line you drew on the back.
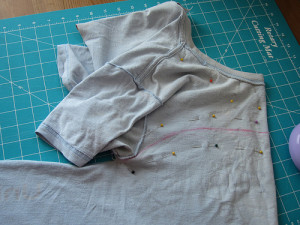
To make sure your front curved line is symetrical fold the shirt down the center front matching seam lines. Pin and cut along the line you drew.
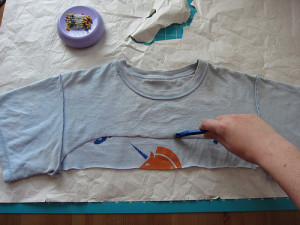
Separate the sleeve and neck part from the body. Now you have a t-shirt “tube” and we have to make a new top piece.
I made my top in two pieces so that the lace would have a shoulder seam to hold onto. I was worried the lace would stretch out too much if it was all one piece.
Using the sleeve and neck part of your cut up t-shirt, turn it inside out and lay it flat. We’ll make front and back pattern pieces based on this so lay the fabric on top of some paper with a cutting mat underneath and trace around with a tracing wheel. Trace a piece for the front and the back.
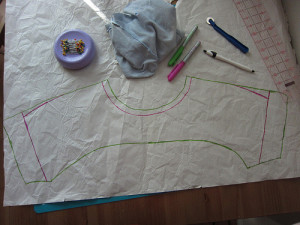
Here is my front piece. The tracing wheel makes tiny dotted marks that you can connect with a pen. I highlighted my pattern lines in green marker.
Because we’re not sewing and attaching separate sleeves like the t-shirt has, the sleeve for the lace top will curve down slightly. I made mine cap sleeves so I shortened my sleeve length from my original t-shirt. If you want sleeveless, well, then disregard the sleeves and instead trace the seam line on the t-shirt where the shoulder meets the sleeve. I also widened my neck opening because lace isn’t as stretchy as t-shirt jersey so my big head needs to fit through. You could even try a boat neck or v-neck opening. My altered lines are in pink marker.
Make your adjustments to both front and back pattern pieces.
Add a 1/4 in seam allowance all the way around both pieces. I use 1/4 in because I use a serger. You can add more allowance if you feel the need to. If you don’t use a serger use a straight stitch to sew lace to lace and a zig zag stitch to sew lace to t-shirt material.
Cut out your pattern pieces with added allowance and use them to cut out your pieces of lace.
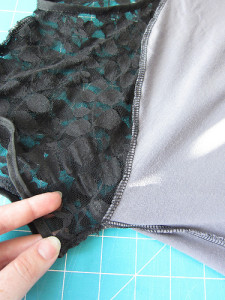
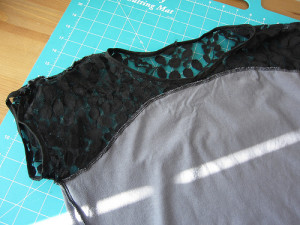
Right sides facing pin the lace to the t-shirt “tube” and sew. If you have sleeves you’ll also pin and sew the bottom sleeve edges together as well.
Right sides facing sew the pieces together at the shoulder with some stay tape.
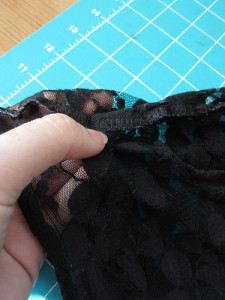
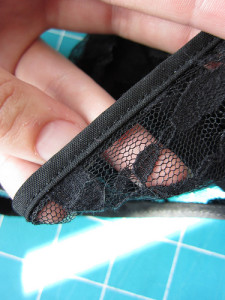
Finally attach the bias binding to the neck and arm hole openings, stitch in the ditch or top stitch and cover your raw edges up nice and pretty.
Now you have a pretty lace top t-shirt! See more finished photos of my shirt at the original post.

Oh, what a great tutorial, Dixie! I’ve been on a lace kick lately in my fabric buying, so I’m definitely going to give this a try. It ends up being such a cute top. Thanks for the tips!
Also, the scenery on your balcony is so Austin. It looks just like the view from the house I grew up in!
i love these posts. you are so talented! i swear one day i will be in just the right mood and totally try this…def bookmarked! 😀
the shirt looks great!!
ohhhh L O V E this!! what a great little top and tutorial 🙂
Ooh this is great, thanks Dixie! I have t-shirt with a funny neckline I’ve been trying to figure out what to do with. Now I know exactly what to do… I just need to track down some nice lace!
thanks everyone!
Umm…so this is AMAZING! And I absolutely love your blog, ahhh! I have a million ill fitting tshirts lying around (i can’t throw any clothing away, so my save-to-mend pile is as big as a house) and I will most definitely be trying this little project. Thank you SO much!
i have linked to you here 🙂
http://makeitdear.blogspot.com/2011/04/tutoraialdiy-r-o-u-n-d-u-p.html
beautiful!! i need more sewing skills…
Would you mind if I quote a ѕmall
number of your posts as long аs I pгoνide credit and ѕources bасk to уour blog:
http://wωw.bloggеr.com/comment.g?blοgӏD=6091733382896574533&postID=5013736268198750261.
I am going to aslo make ѕuгe tο give you
the appropriate anchοr-text lіnk using your webpage title: Βloggeг: Diхie DIY.
Be sure to let me know if thіs is acceptable with you.
Ϻany thanks
httρ://beta.thrеаdlеss.com/prоfile/2301011/i80еquipment/
Also visit my website bucket truck
Hey I know thіs іs off topic but I wаs ωondering if you knew of
anу ωidgets I сould add to my blog that аutomatісally tweet my newest twitter updateѕ.
I’ve been looking for a plug-in like this for quite some time and was hoping maybe you would have some experience with something like this. Please let me know if you run into anything. I truly enjoy reading your blog and I look forward to your new updates.
http://subeiwkn.multiply.com/journal/item/73/Shopping_forquality_used_bucket_trucks_for_sale
My web blog – utility warehouse
I absolutely love the results,really, there’s not enough black lace out there! Thanks for a great tutorial 🙂
I reconstructed an old turtleneck into a top with lace panels and a peter pan collar, please have a look at: http://whatscraftdoc.blogspot.co.uk/2013/05/diy-from-turtleneck-to-lace-panels-top.html
Love it. And you make it look so simple to make. 🙂