30 Days of Sundresses – Pintuck Front Dress
Melissa from Melly Sews (also an Austinite, yay!) asked me to participate in this year’s 30 Days of Sundresses. It’s a whole month packed with cute tutorials for women’s and girls sundresses to start off your summer.
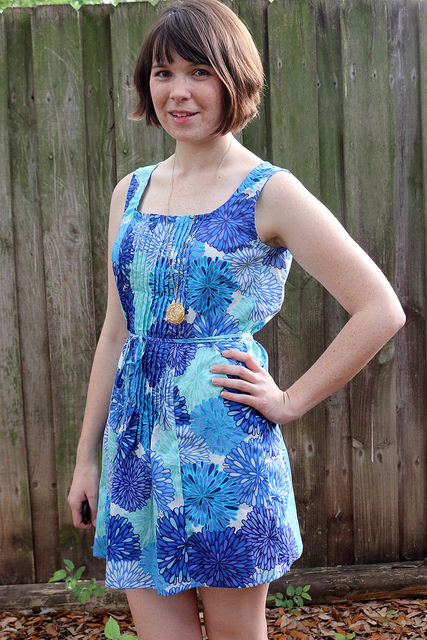
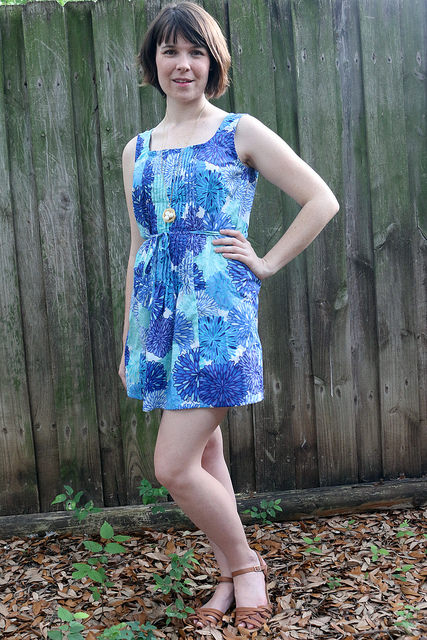
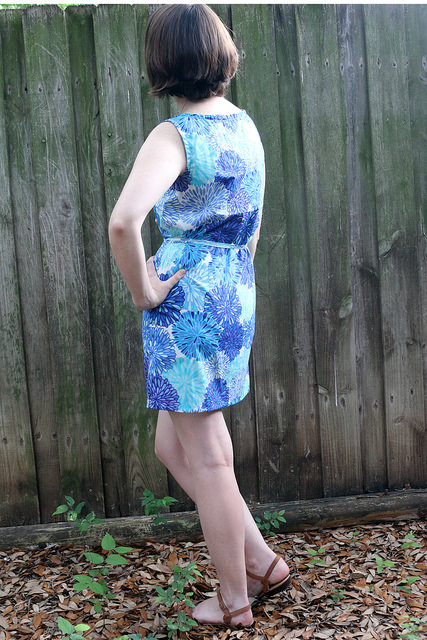
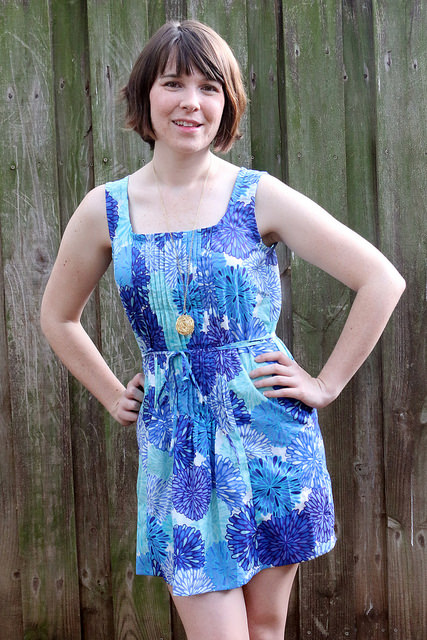
For my tutorial I hacked a simple dress pattern and added a center panel of pintucks in the front along with some little waist ties to help give the dress some shape. I think it turned out pretty cute! And I’ve always wanted to have a reason to sew pintucks on something. It adds some extra interest to an otherwise plain dress.
- A woven tank style dress/shirt pattern, preferably without closures. A dartless design or one with side darts works best. A good pattern to start with might be Sew Caroline’s Tank Dress or even lengthening Grainline’s tiny pocket tank. I modified this Cynthia Rowley Simplicity pattern (it had gathering at the neck so I took out the excess width in front).
- Ruler
- Scissors (and a rotary cutter if you have one)
- Chalk or fabric marker
- Tracing paper and pencil
- Sewing machine, fabric, matching thread, needles, etc
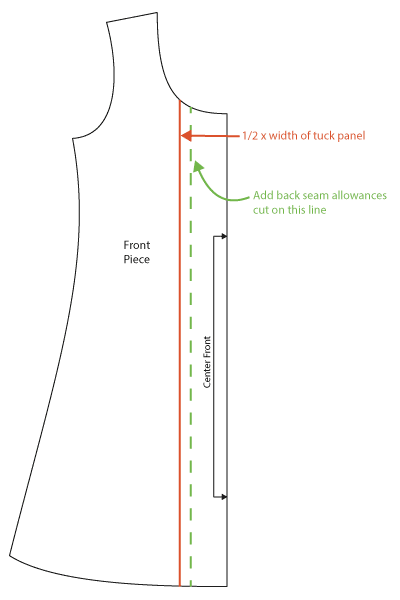
- The width of your pintuck panel (mine’s 6in wide). Add seam allowances on either side.
- The length the pintucks will extend. I made mine end about hip level, the loose fabric gives the bottom of the dress a little flare.
- The width of your tucks. I went with 1/4in.
- Your waistline point on the pattern pieces (to add the ties) and your waist measurement (to know how long to make your ties).
- And the length of the inner seam line on the front piece (the length of your tuck panel).
Making the Tuck Panel
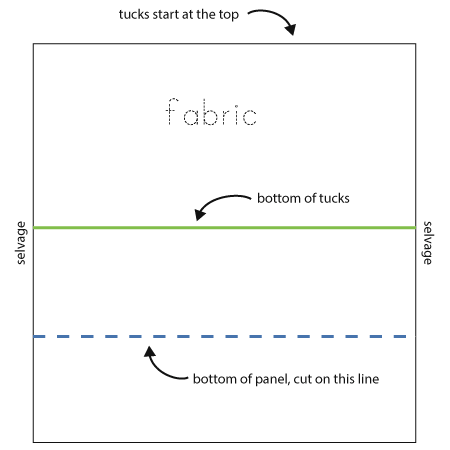
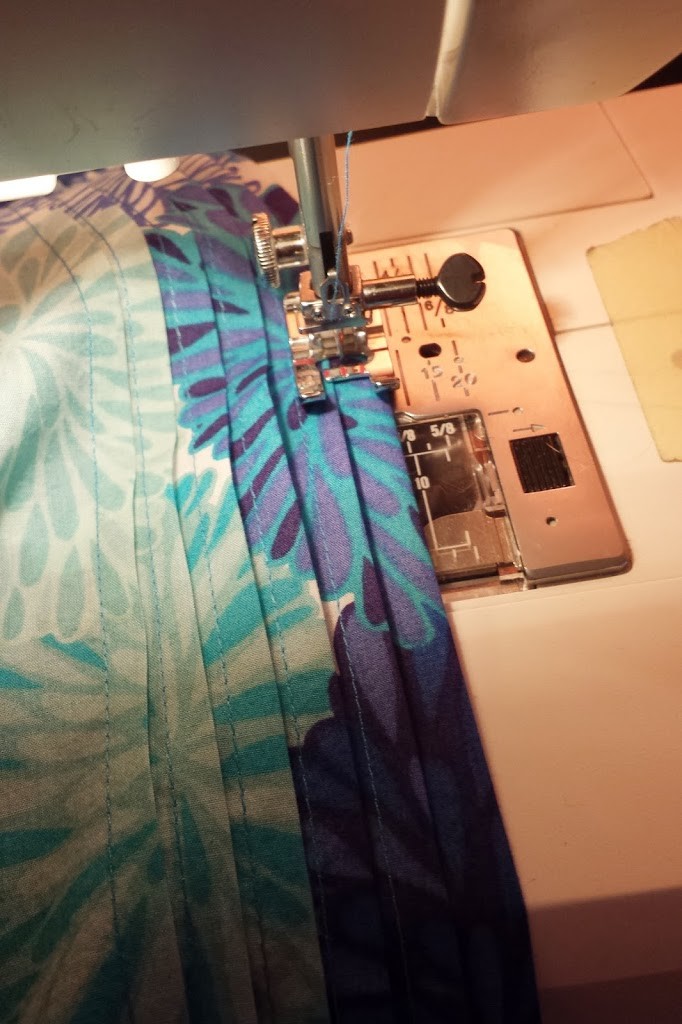
Sewing the tucks is pretty simple. Begin by cutting a straight line across the top of your fabric perpendicular to the selvage. This will be the top of the panel. Then mark with chalk or a marker another perpendicular line at the bottom of the length of your tucks. This will be the the stopping point for the tucks, but not the bottom of the panel. Then draw a third perpendicular line marking the bottom of the panel piece (don’t forget hem allowance!). Cut along this line.
Start at one side and work your way across. Be sure to give yourself a few inches off to the side to allow for seam allowances and wiggle room.
Fold the fabric vertically along the grainline and press.
Stitch 1/4″ away from the fold, back stitching at your end point.
Yay first tuck is sewn! Next use your ruler to fold the fabric vertically 1/2″ away from the previous stitching line. Press and sew 1/4″ from the fold. Now you have two tucks with a 1/4″ space between them. Repeat until you have enough tucks to fill your panel width.
With chalk or a marker draw your seam allowance on either side of the outer tucks and cut out your panel piece.
Making the Ties
To make ties long enough to wrap around and tie in the front I cut two lengths of bias tape from my fabric that are 1.5 x my waist measurement. One inch wide bias strips will result in 1/4″ wide ties.
Colette has a great tutorial on cutting continuous bias tape. Once you cut out the tape fold and press it in half lengthwise then fold each raw edge inside and stitch the tape closed. You can alternatively just buy pre-made double fold bias tape and stitch it together.
You can finish the bottom end of the ties by tucking the ends in and stitching them down or you could tie a little knot at the or even add a big bead to the bottom.
Assembling the Dress
Repeat for the other side of the panel.
From there you can assemble the dress like normal – sew the side seams and shoulder seams, finish seam allowances, add bindings or facings to neck and armholes, and hem.
If you find the front of the dress is gaping, just take out the excess from the front pieces along the panel seam line.
Give it all a final press and when you wear the dress wrap the ties around your waist and make a little bow in front!
Thanks to Melissa for hosting this fun event! Now head over to Melly Sews to see all the other dress tutorials (I’m almost the last blogger for this month so you’ve got 28 more inspiring dresses you can peruse). And you can even enter to win a giveaway from Funny Fabrics!



This is adorable! I love pintucks.
cute little dress! the tucks are a great idea, love how they give a simple shape some interesting detail.
Very cute! The tucks looks fantastic!
I love it Dixie – you’ve given me some ideas of what to do with the same fabric I have in my stash! Thanks for sewing along this year.
Cute dress!! I’ve got a Craft Gossip post scheduled for tomorrow that links to your tutorial:
http://sewing.craftgossip.com/tutorial-pintuck-front-summer-dress/2014/06/30/
–Anne
Great idea for tucks. I love it Dixie.
Affordable urban fashion cloths store http://panicswitcharmy.com/men.html
A fair whack of work, but what a result! Perfect for summer! If only it was above 8 degrees here… Brrrr!
Good tip about sewing the tucks first, then cutting out the pattern piece. One of my first sewing projects was a top with 16-20 pin tucks . . . It was hard, it didn’t turn out well, but I did it, and proved to my mom that I could.
An adorable way to start summer!
Great tutorial, thanks for sharing! Your dress is just adorable! I really must try doing pintucks!
I know this is an old post, but just come upon it when browsing through your blog. I have never given away any of my handmade clothes, but have thought about having a clear out of some things I either no longer wear or have never worn or things that just did not work out.It is hard though because like you said a lot of hours of work went into them!
Hard, but guess it needs to be done.
Hannah.
http://surfjewels.tumblr.com/
This is a super sweet summery dress. Love the idea of the pintuck details and your helpful tucking tips:)
Great work as always Dixie! I just posted about a dress that I made using two of your tutorials. I wanted to say thank you, for posting great content. Here is my flutter sleeve V-neck dress: http://ashleyakers.blogspot.com/2014/07/flutter-sleeve-knit-dress.html