Sew Liberated Myla Tank
First of all I wanted to again thank everyone who emailed me about testing. I’ve sent out emails to the ones I’ve chosen but I got so many responses that I’m just not able to email everyone else so if I haven’t emailed you back, sorry, but I’m collecting your email addresses into a list to send out for my next pattern testing and you’ll get first dibs if you want. 🙂
In other news – I got a teaching job! There’s a new fabric/yarn store in Austin called Me & Ewe that recently opened and I’m signed up to teach a beginner’s class and a class to make this tank top. This is my sample that I’ll use for my class.
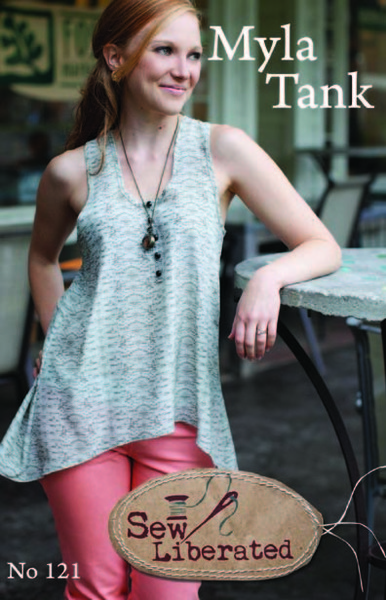
The Pattern: The Myla Tank by Sew Liberated. It’s a quick and easy shirt pattern with no darts (yay!) a curved hem with an overlapping split back, bias bound neck and armholes, and a faux button placket in front.
The pattern uses French seams which I think is cool and might also be a neat technique to teach in my class.
The Fabric: A Katy Jones for Art Gallery print that I of course got from Me & Ewe. The pattern calls for light fabrics like lawn or challis but while this is technically a quilting cotton Art Gallery’s fabrics are so thin and light that I thought this would still work and I think I was right.
The yellow buttons are from my stash.
The Changes: I made a size 6, if I remember correctly. The only change I made was to the front armhole. I had some gaping there which I debated whether or not I should make a small armscye dart.

I noticed looking on the envelope cover itself that the model has the same gaping that I had (on the model’s right side).

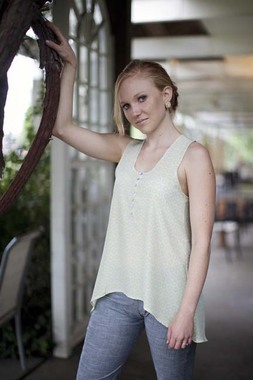
Even this alternate sample from Sew Liberated had the gaping, too.
To fix it without altering the pattern I ran a length of basting stitches around the front armhole curve and pulled the ends ever so slightly to make almost unnoticeable gathers (sort of like when you ease a sleeve cap into the armhole). Then I bound the armhole to make the gathers permanent.
Problem mostly solved! I know from experience that the larger the bust the more curvy that armhole needs to be so if I’m working with students with that feature I may have to do some pre-emptive fitting. If we make muslins we can dart out the gaping and open up the shirt at the bottom to rotate that ease away.

The Results: I quite like this top. It was fast to put together. I like that the placket is fake because I am lazy. The split back makes it easy to sit down and bend over without the shirt getting caught on your bum (also good for those of us with larger backsides).
The bra I’m wearing criss cross straps so you don’t see them in back. I don’t mind visible bra-straps on a racer-back shirt but what I do mind is side bra. I had to dig though my bra collection to find one that wouldn’t show so much in the armhole. You can still see a bit of side bra depending on how I stand, more so in the front than the back.
I’m just going to have to accept that this tank has big armholes and that’s just how it’s gonna be. I’d probably redraw the front armhole entirely if I make this pattern again (maybe using the awesome Scout Tee armhole shape).


Usually gaping in the armhole like that is rotated into the shoulder. You can test the alteration by just pinching the outside of the shoulder up a bit.
Oooh, great idea and it can be done even after you’ve already cut out the fabric. I’m going to try that… Thanks!
Congrats on your teaching gig!!! This will be a great pattern for learning on – a nice basic with lots of fun details. Double win!
Thank you! Yeah, I hope potential students will be into it, as well.
I love the detail in the back! Flowers are everywhere, I think summer is coming 🙂
Thanks! I love a good floral print…
I’m so excited about Me & Ewe. You’ll do great with your new students! I like the look of this tank, the armholes. Keeps it from being too plain. It’s “sporty,” yet modest.
Me, too! And I like the racerback look as well. Thanks!
This is a really cute top in such a cheerful fabric – I love it! Thanks for this post – I hadn’t heard about this pattern, and it’s pretty close to what I’ve been looking for in a summer tank. I think it’s really tough to find a perfectly fitting armhole, especially in a loose tank, unless you draw it in yourself. Will be curious to see your adjustments if you make another one – which you totally should because this one is great! 🙂
Thanks! Yeah, I’ll definitely be trying this again, maybe in a rayon challis for a nice drape-y look. I’ll do some armhole experiments then. 😉
That looks sooooo comfy! I love the smoothness of Art Gallery cottons. Great job.
I love that fabric!!!
Great news on the teaching job. Those beginners are going to learn quite a few good techniques from this top.
Congrats on the teaching job – I bet that will be so fun! This top looks great and I love that print (I have some in my stash too).
I love it!! Looks fresh and gorgeous in the Priory fabric too. Congrats on the job. 😉
I really like the back! And woah, that fabric is SO pretty.
BTW, how was your party?
Thanks, party was good. It actually went quite smoothly and everyone had a good time. My friend made cake pops. We played bingo. Fun times.
Such a great little top. Love the fabric works perfectly with jeans!! Congrats on the class that should be fun and I’m sure they appreciate having you as the teacher.
Thanks, lady!
LOVE this floral, and super cute, flattering tank!!