Sewing with Slippery Fabrics
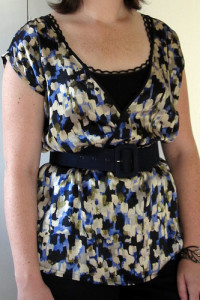
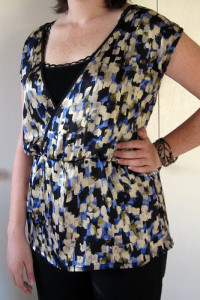
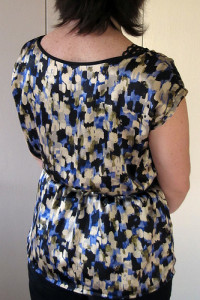
I mostly consider this shirt an experiment in sewing with slippery fabrics.
The pattern (McCall’s 6354) wasn’t made for this type of super slinky charmuse (I think that’s what this is, a polyester charmuse) so I didn’t expect it to look exactly like the pattern picture.
This fabric I bought on sale a long time ago because I really liked the print but then I was left wondering to myself – why would I possibly buy fabric that was so hard to work with and what could I do with it?
This pattern is similar to the design idea I imagined for this fabric so I thought I’d give it ago and try out some techniques I found around the net on how to work with slippery fabrics.
Now, if you’ve ever had the misfortune of cutting and sewing anything sheer or satiny or silky (or anything with an “s” sound in the word, come to think of it) then you feel my pain. Here’s some of my best tips for dealing with this fabric from hell.
Preparation:
You know all those things you’re supposed to do before sewing that sometimes you can be lazy about (or maybe I’m just lazy). Now is not the time to ignore those steps.
- Make sure you prewash and lay the fabric out flat. Prewashing will help the fabric lay in it’s natural position.
- Change your needle(s) to the appropriate size and use a nice fresh one. You don’t want any snags!
- Check that your machine is in tip top shape. Thread jamming up will make you even more annoyed than normal.
Cutting:
- Layer the fabric right side up over a piece of paper like blank news sheet. Pin the selvage or fold to one edge of the paper and lay the fabric flat. (I was lucky, close up my fabric had distinct tiny lines to help make sure my fabric was straight).
- Use pattern weights to keep the fabric from shifting as you pin.
- When you cut your pattern pieces leave an inch or two around the edge of the pattern cut lines. Plop your pattern piece onto the fabric and pin both inside and outside of those cut lines. Pin through all layers – pattern paper, fabric and bottom paper.
- Use plenty of pins. Like twice or more of the normal amount you might use.
- You don’t want to dull your fabric shears but you don’t want to use some dull paper scissors either. Get your best all purpose scissors for cutting through paper and fabric together.
- Keep your bottom paper pinned to your fabric piece.
Sewing:
I used a combination of these techniques depending on the kind of seam.
- You can sew through the paper with the fabric on seams. With your paper still attached pin your pieces together and stitch. Since you cut fabric right side up and most seams are right sides together the paper should be on the outside. The stitching perforates the paper making it easy to tear but be cautious and tear carefully just in case. Oh, and it probably doesn’t need to be said but be sure to tear your paper off before finishing your seams. Otherwise it will be much harder to tear off your paper!
- On shorter seams like shoulders unpinned the paper from just that area and pinned the fabric together on it’s own. I also inserted some stay tape into the seam for extra stability. Don’t bother trying to pin it, just slip it in as you sew.
- On bigger seams and hems I used temporary fabric adhesive spray. It’s the same stuff I used on my quilt only I sprayed much smaller amounts. Be sure to do this outside by an open window. I just sprayed the wrong side of my fabric and folded over twice for hems and pinned immediately. It’s a miracle product! The adhesive remains tacky for a couple minutes allowing you to move fabric around if needed and if it dries just spray a little more. The spray dissolves in the washer.
- For the bias binding (store bought, like I’d try to make bias tape myself out of this fabric, ha!) I attached it like I would with any fabric except I used my handy dandy adhesive spray and I gave myself a little extra wiggle room. I placed the edge of my bias tape about a quarter inch inward from the edge of my fabric. This helped to make sure that when I folded my tape over and stitched I would fully encase my edge.
- Don’t forget – use plenty of pins while sewing, too!
In general sewing with slippery fabrics requires more patience and determination but there are tricks you can use to make sewing smoother. If you’re tackling a big project like a silk party dress try out some of these techniques in advance and see what works best for you!
Will I be working with fabric like this any time soon? No, probably not! I’m trying to convince myself of the fact that my wardrobe is much more casual than I think it is and that slippery fabrics are more reserved for fancy dresses that I never have occasions to wear.
Do you have any other tips that I missed? Who knows. I may have to use them eventually. 😉


I love the print and this shirt looks great with the belt (belt definitely needed – good call).
Your v-neck is way lower than my v-neck using this pattern, is it just the drape of the fabric? Or did you go with a larger size? Or did I line something up wrong because I’m also having an issue where my front bottom panel is way bigger than my top bodice panel…hmmm…
Jess, it could be a couple things – one, I lowered my elastic line by one inch so it would sit at my waist rather than slightly above. Also, since my fabric is so “drape-y” it kind of sags much more than a stiffer fabric would. And I think I should have cut a small. The shirt is a tad bit big.
Are you matching your v-neck pieces up right with your bottom front panel? Maybe you overlapped them too much making the front elastic seams uneven. I mean, I don’t know, that would be my only guess without seeing. Mine were the same length. I hope you can figure out the problem!
I totally overlapped my v-neck pieces too much, but I ended up liking it – it was too gapey otherwise. I just cut my skirt front smaller to match. And yeah, this pattern was super big. I’m not used to that.
Anyway, I finally finished: http://needledown.com/2011/07/week-8-mccalls-m6354-tunic-shirt-two-week-success/