30 Days of Sundresses – Indigo Dyed Beach Cover Up
My good friend Melissa from Melly Sews is a fellow Austinite. You might have seen me talk about her a few times.
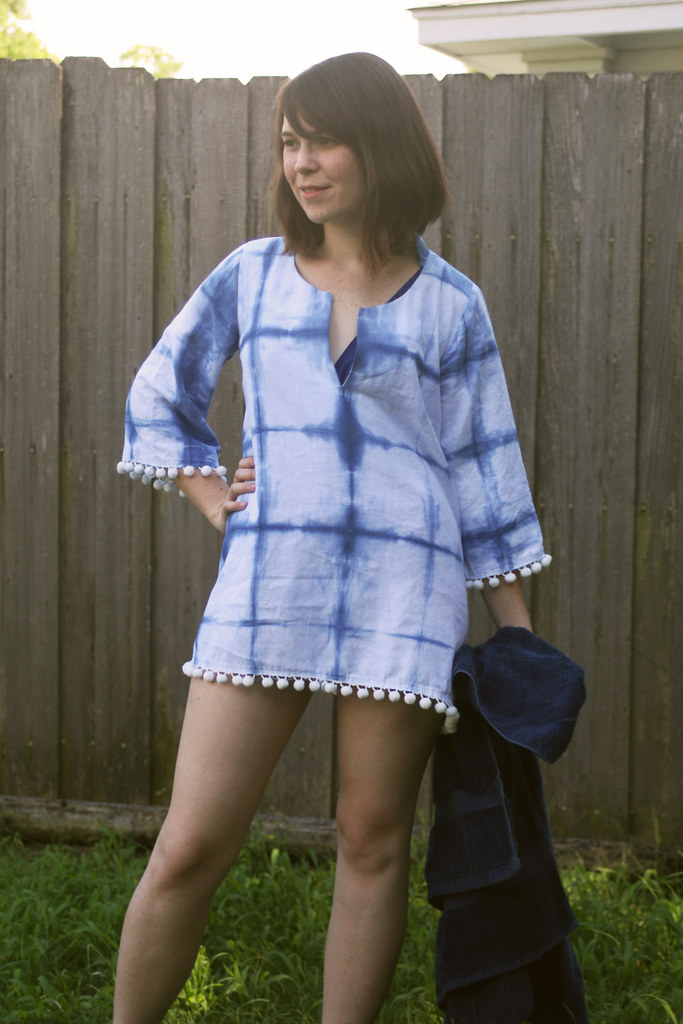
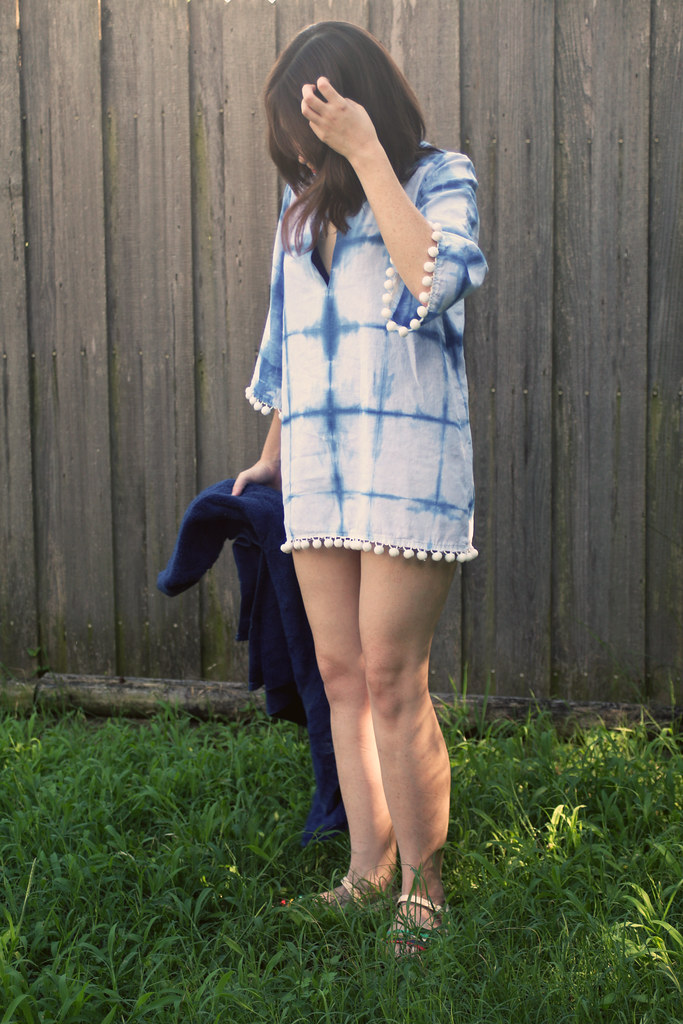
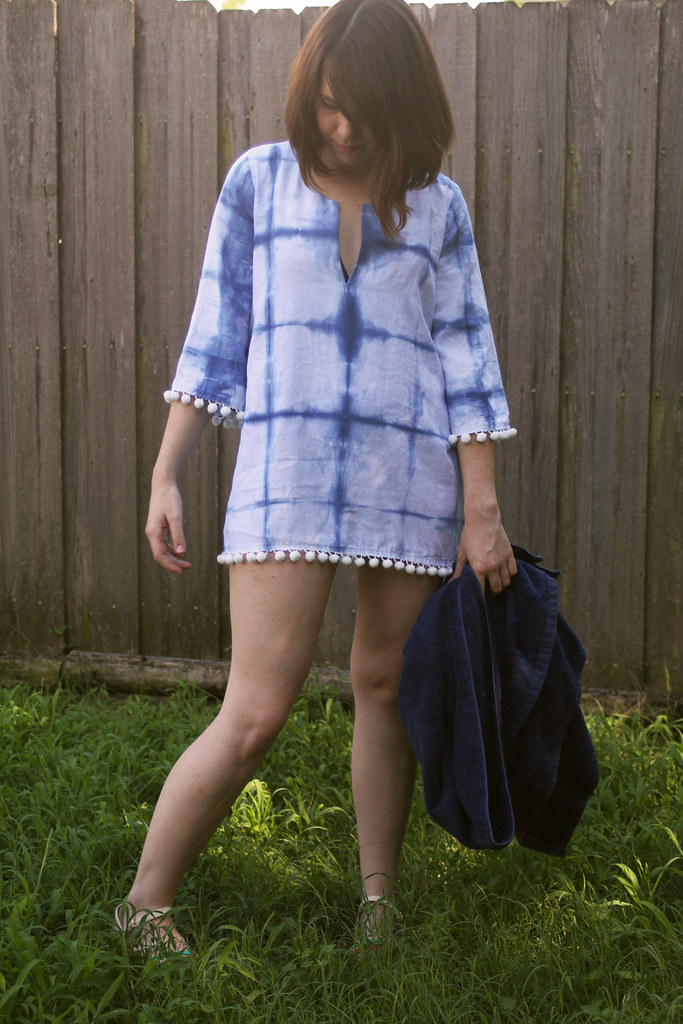
Like last year I decided to join her month long celebration of summer-y dresses but this time I wanted to mix it up so I made a fun beach cover up. And as my upcoming island vacation is not for another couple of months I’m afraid my backyard fence will have to stand in for white capped waves and beach umbrellas.
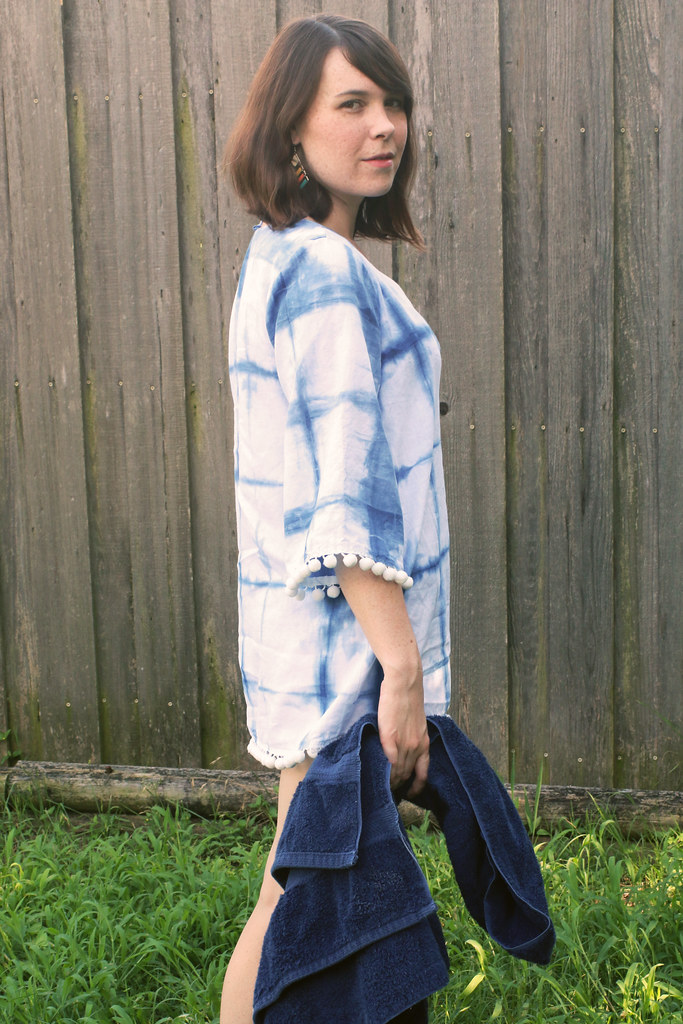
I was inspired by the tunic-style simple dresses I’ve seen. I also liked long sleeves because I hate to get sunburned. It rather short, and the front slit rather deep so no one would mistake this for a real dress. It’s very much a walk-from-the-beach-to-the-resort-lobby kind of garment.
I like the breezy look of white fabric but I wanted an extra bit of flare so I decided to dye my fabric.
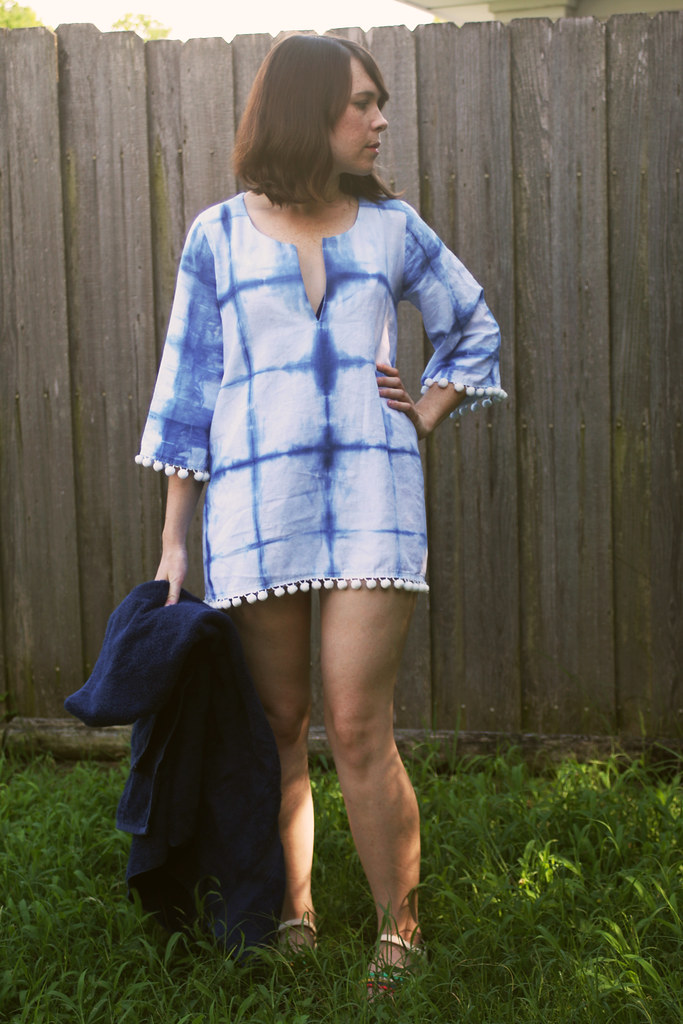
Oh, and pom poms! ‘Cause when else do you really get to flaunt some chunky pom poms on your clothes?
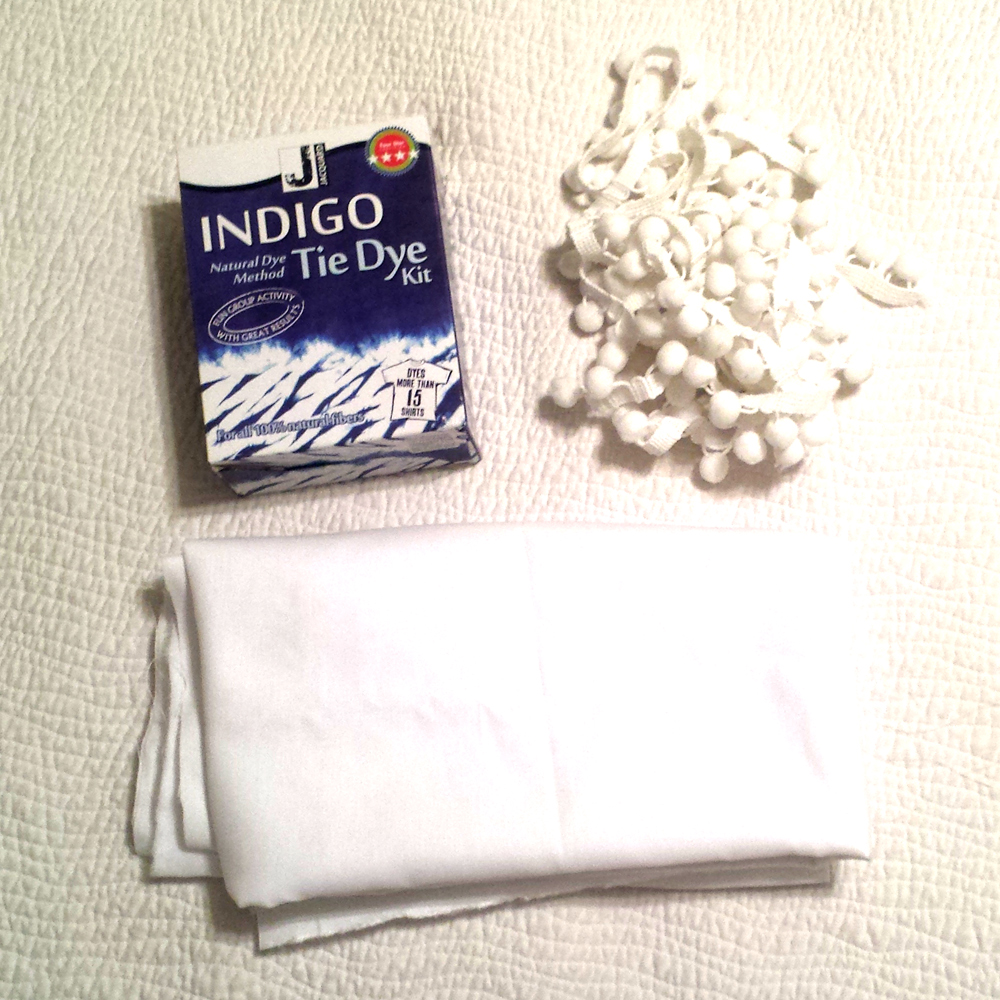
For this design you will need:
– About 2-3 yds of natural fiber white fabric. I used a linen/cotton blend.
– About 3 yds of big pom pom trim.
– A bucket or large container WITH A LID. Plus another bucket or bowl for water to soak your fabric.
– A dowel rod or something that can be used to stir the dye – NOT a food utensil.
– Water
– An indigo dye kit (I used this one, which has all the materials you need) or your own dye.
– A plain t-shirt or woven bodice sewing pattern with sleeves. I’m using Grainline’s Scout Tee because it doesn’t have any darts and I am too lazy for darts.
Dyeing the fabric:
I dyed my fabric prior to cutting out the pieces just in case I messed up.
I did cut down my fabric into two smaller sections so that it would be easier to fold and handle.
Following the kit directions I went outside and put 4 gallons of warm water to my plastic box.
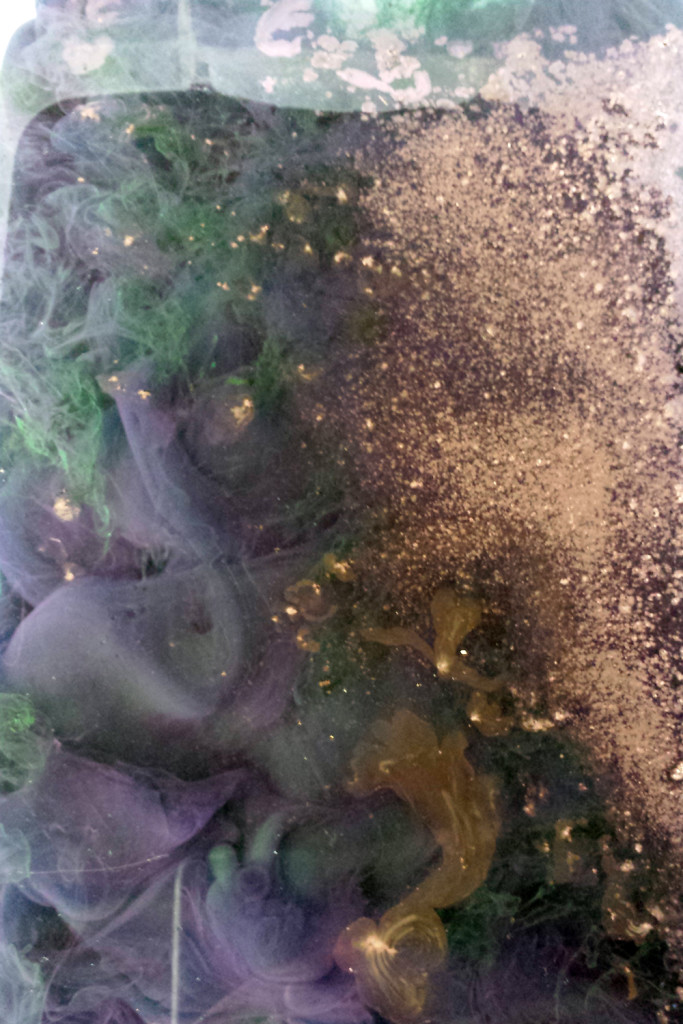
Then I poured in the indigo dye. It quickly starts to change color once it hits the water. Neat looking, right?
After that I added the reducing agents and mixed. The key to indigo dying is to not introduce oxygen in the dye so you always need to stir very slowly without splashing and cover the dye container in between uses. Oxygen “sets” the dye so if too much gets in the dye vat it won’t work.
Stir the mixture gently and let sit, covered, for about half an hour or until the liquid itself turns a lime green color and the top of the vat has a layer of darker blue on top (called “flower” or “bloom”). It kind of works like a protective barrier to keep oxygen out.
Prepare your fabric by folding it up. For my square pattern I folded it accordion style down one direction then the other making a nice little stack of fabric. The kit comes with a booklet of patterns to try.
Then I placed the two wooded boards included in the kit on either side and secured them with rubber bands (also in the kit).
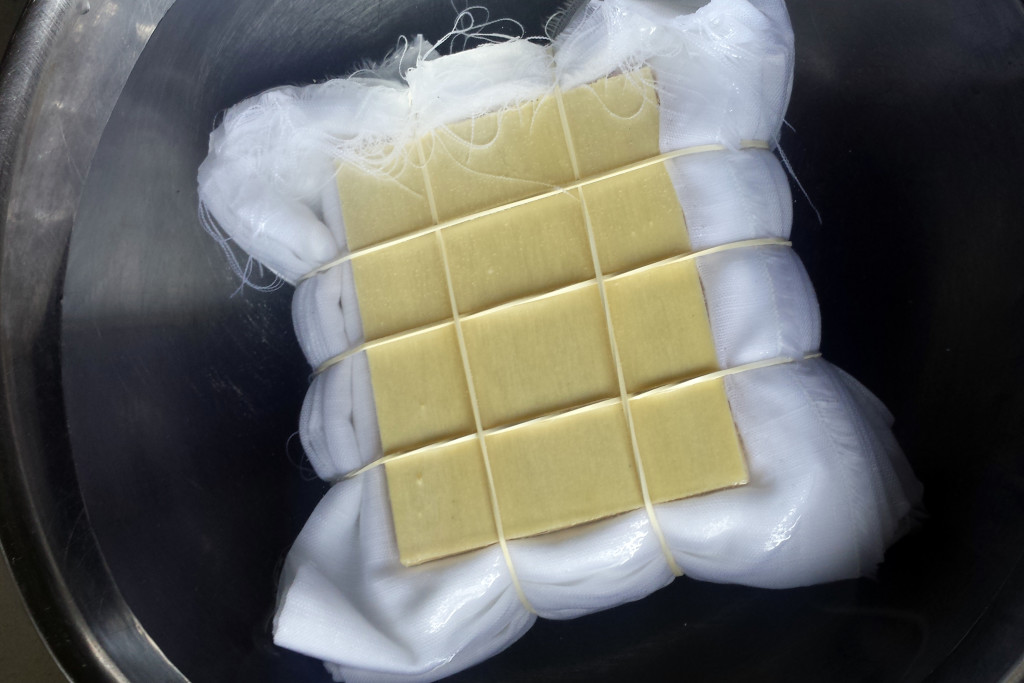
I soaked the fabric in water and squeezed out excess air and fluid and transferred it to the dye vat.
You’ll need gloves for this part, obviously. Push the flower aside and carefully dip the fabric in the vat. Don’t let it hit the bottom as sediment can collect down there.
I kept my fabric submerged for only 2 min or so but you can keep yours in longer.
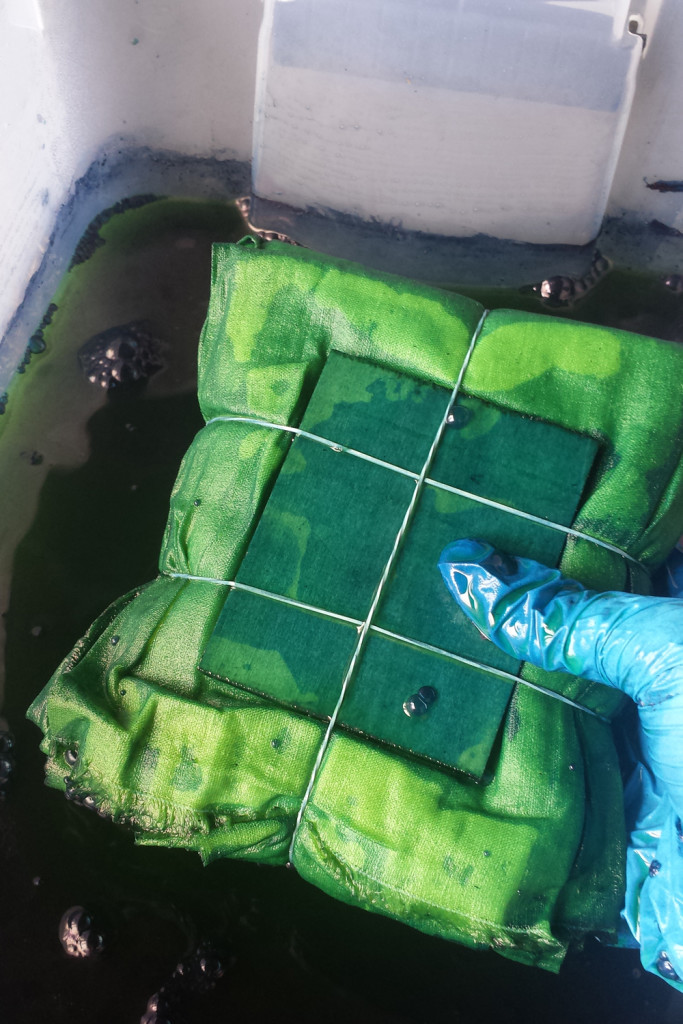
Then take it out and set it aside. It will look lime green but after exposing the newly dyed fabric to air it will begin to turn blue.
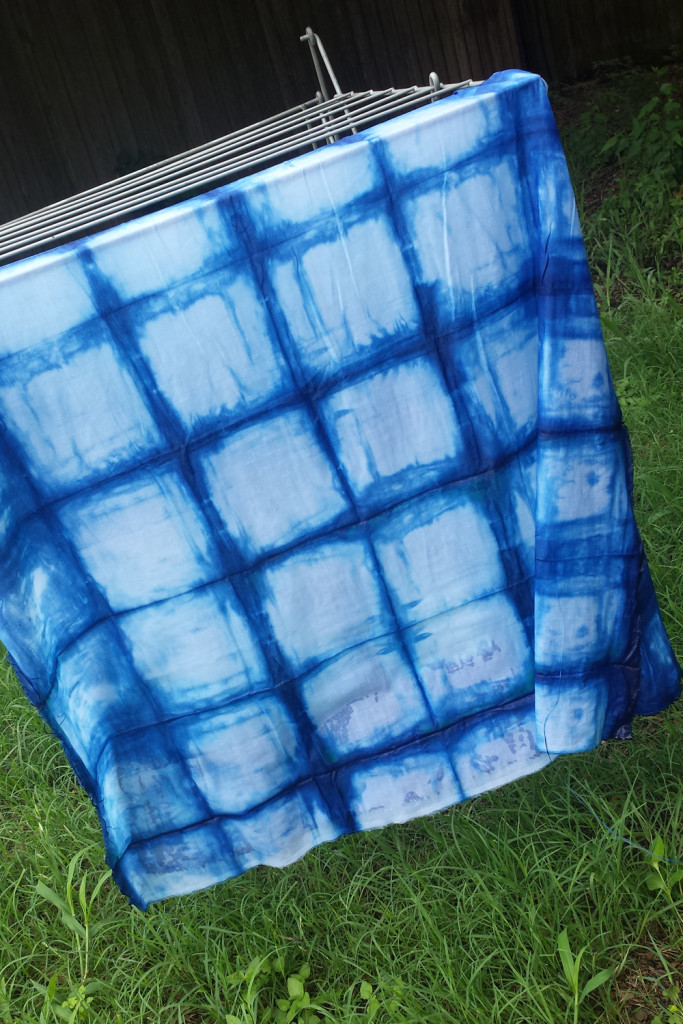
The fabric looks darker while wet.
When you’re finished you can keep the vat covered and it will last for about a day just in case you decide to go dye-happy and find every white shirt and pillowcase in your house and dunk it in there.
Cutting pattern pieces:
After the fabric has dried, gently wash and iron it.
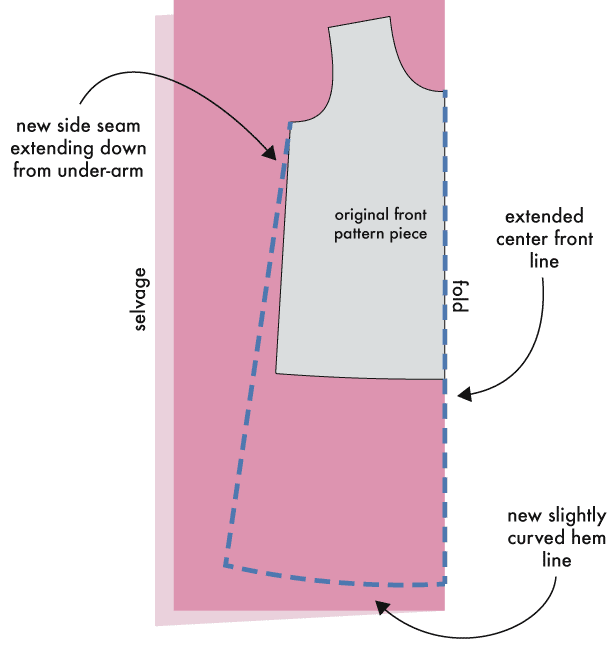
From here you need a few measurements. 1) The length of the dress from the center front neckline point to hem + seam and hem allowances, and 2) the length of the sleeve from the underarm point to hem + seam and hem allowances
I took the front and back pieces of my scout tee and aligned on the fold of my fabric. Then, with my ruler I extended the center front line down from the neckline to my new hem (Measurement 1). I next extended my side seam down and slightly outward from the underarm point and drew a gently curved line connecting my new center front and side seams at the hem.
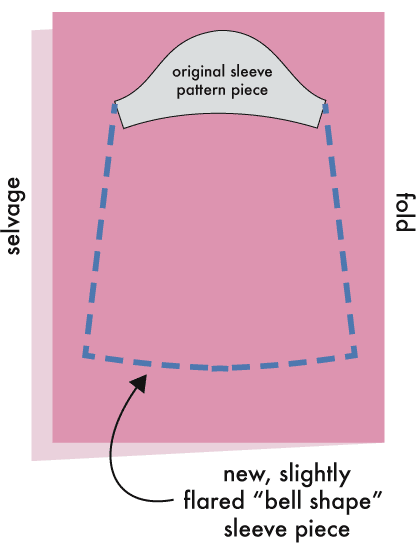
I made the sleeves longer by doing something similar – extending the seam lines down and out to give the sleeve a bit of a “bell” shape, and adding a slightly curved hem (Measurement 2).
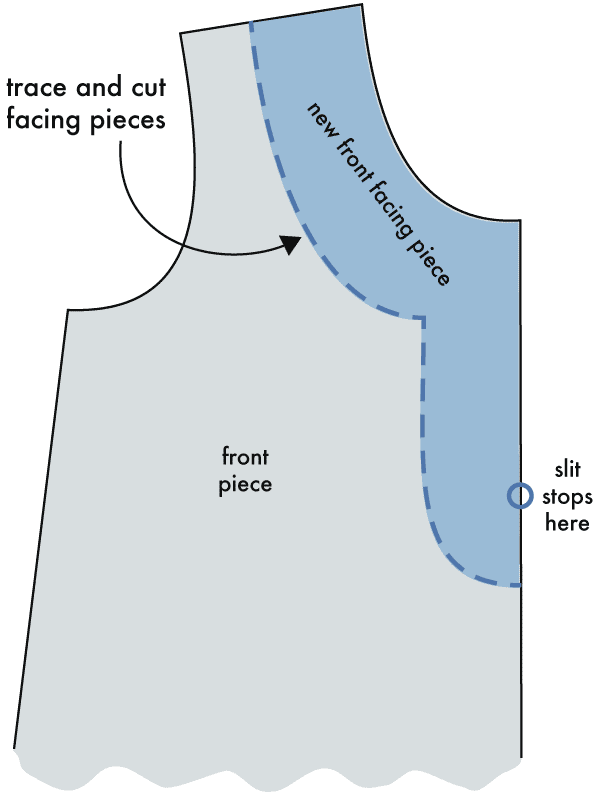
For the neckline you have a few options. You can simply bind it with bias tape or you could make a facing with a neckline slit like I did by copying the neckline curve from the original front and back pattern pieces.
Assembly:
Almost finished! From here I put together the pieces like normal.
If you made a new facing sew it on like this:
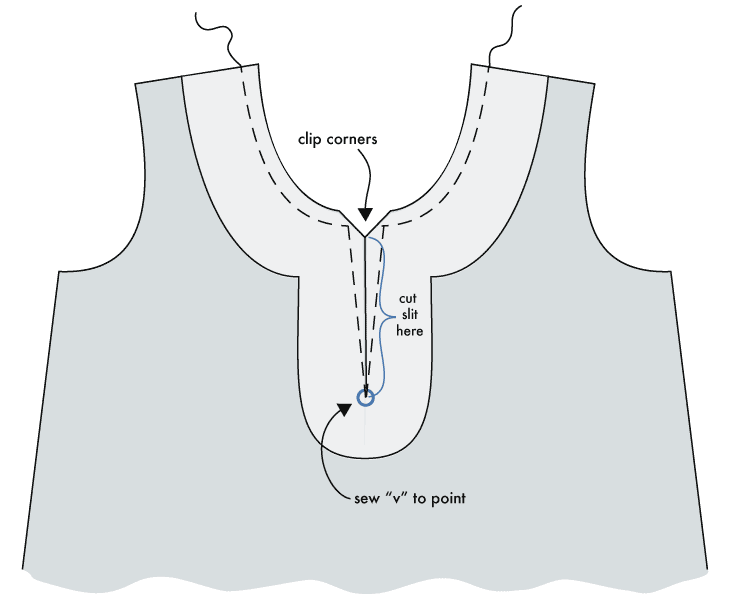
- Add interfacing if you like to the facing pieces.
- Sew the dress front and back at the shoulders. Sew the facings at the shoulders.
- Finish the raw outer edges of the facings.
- Right sides together, sew the facing around the neckline. When you reach the front slit, stop, pivot, and continue down to your slit end point. Pivot and continue back up making a narrow “V” shape. Pivot again back at the top and continue around to the end.
- From here you can cut the slit. Be very careful not to cut through the stitches. Clip the corners. You can undersitch the seam allowances to the facing if you’d like.
- Turn right side out and press.
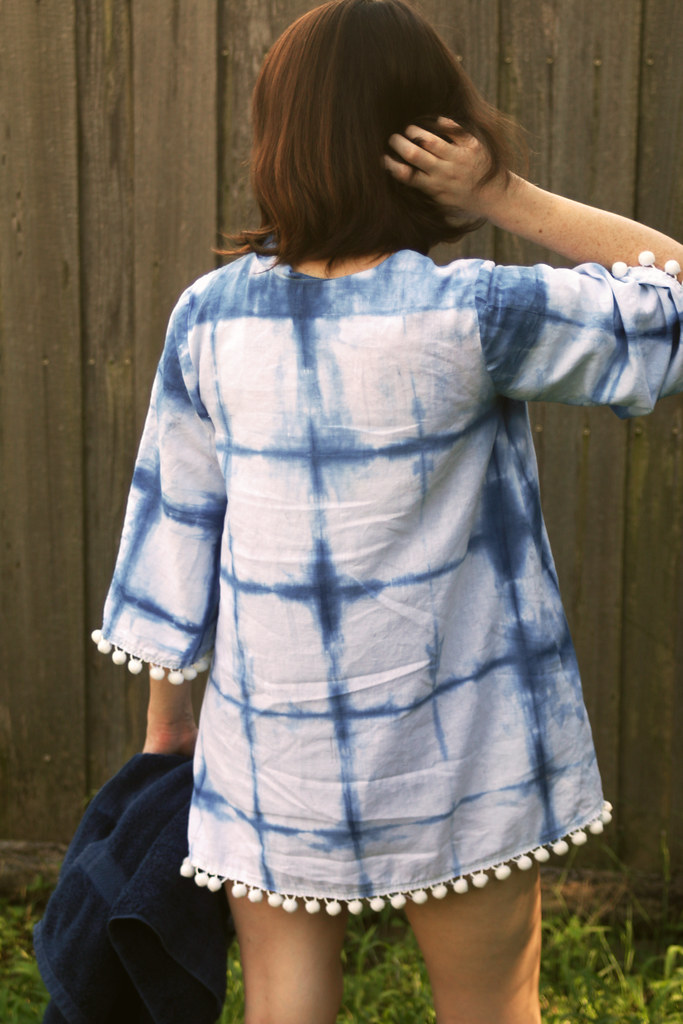
For the sleeve and dress hems I folded the raw edges inward 1/4″, slipped the pom pom tape inside so it is covered by the folded fabric (and you only see the poms from the outside) and zig zagged around the the edge.
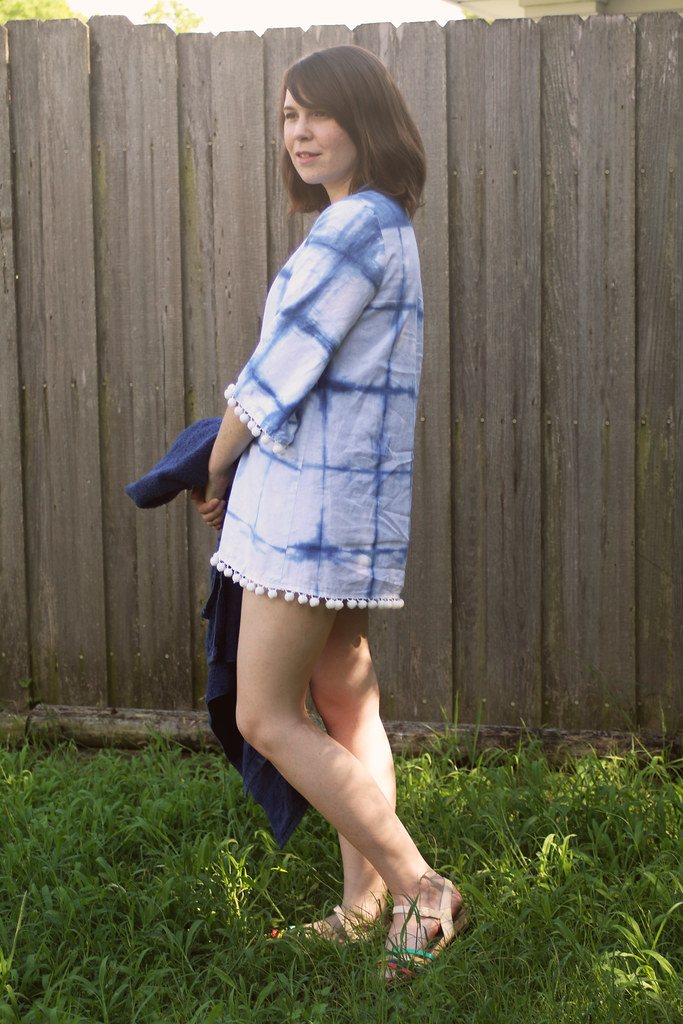
I hope you found this tutorial helpful!
Melly Sews is also hosting weekly giveaways celebrating 30 Days of Sundresses. This week you have the chance to win one three detailed and informative online pattern drafting classes (Melissa has her own pattern company so she has a lot of experience in that department). You can click here to enter.
Thanks for reading!

I LOVE this!! Such a fantastic beach coverup! The pom poms are the perfect touch!
Thank you!!
I totally love this! Now I can finally use my shibori kit and some pom pom trim I bought a hill ago.. I made a cover up already but it’s silk and how impractical is that!
Thanks! Silk may be impractical but I bet it looks and feels incredible! That’s some high class cover up you made. 😉
Simple and pretty!
Thanks Allie 🙂
So cool! I really need to get on this tie dye trend before it’s gone, I just love it!
Thanks! I think the indigo color and the shibori style makes it more timeless than other types of tie dye. 🙂
This is awesome. I have been wanting to dye something this summer!! Love the pom poms!!
Thank you!
Love this! My sister was joking with me about pom pom trim and that it doesn’t really have a use! I love how you used them here! They are perfect!!!! I’m sending her this link and I’m gonna say “told ya so!” Thanks!
Thanks! I’ve always wanted to find a cool way of using the big pom poms. I’ve added the tiny pom trim to shirts before but the big trim makes such a visual impact.
this is SUCH a good idea. i want one!
What a cool idea! I love the pom pom trim. I did a shibori workshop last month and am still trying to decide what to make from my fabric. I am thinking some summer shorts.
Verrry cute! 🙂 Love the added touch of the pom pom trim! The perfect summer outfit. xo
http://www.GlossyFinds.com
Love the dye job! We should have a dye party with the sewing group sometime!
Lovely! Perfect use for your pretty dyed fabric!
This dress is just the cutest dress and I LOVE the tie dye. Your instructions are great, so helpful! What a perfect dress to wear to the beach 🙂